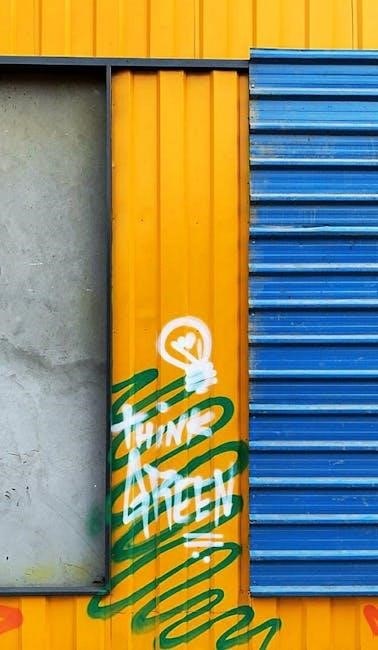
Vertical metal siding offers a modern, sleek appearance with long-lasting protection. Ideal for barns, garages, and homes, it provides durability and low maintenance in various colors and styles.
1.1 Benefits and Advantages
Vertical metal siding provides exceptional durability, resisting weather, pests, and fire. Its low-maintenance design reduces upkeep, while its sleek appearance enhances curb appeal. Available in various colors and profiles, it offers versatility for modern or rustic designs. Energy-efficient options, like insulated panels, can lower energy costs. The smooth, non-porous surface resists mold and mildew, ensuring longevity. Unlike wood, it doesn’t warp or rot, making it ideal for harsh climates. Easy to clean and resistant to fading, vertical metal siding is a practical choice for homeowners and builders seeking a durable, attractive, and cost-effective exterior solution. Its timeless appeal ensures long-term value and satisfaction.
1.2 Common Applications
Vertical metal siding is widely used for barns, garages, and modern home exteriors, offering a sleek, contemporary look. It’s ideal for gable ends, accent walls, or entire building facades. Homeowners often choose it to break up long horizontal surfaces or add visual interest. Available in board and batten or V-groove profiles, it suits various architectural styles. The siding is also popular for commercial buildings due to its durability and low maintenance. Its versatility makes it a favorite for both rustic and urban designs, providing a seamless blend of functionality and aesthetics in any setting.
Tools and Materials Needed
Essential tools include utility knives, screwdrivers, and saws. Materials required are metal panels, furring strips, weatherproofing accessories, and fasteners to ensure a secure and durable installation.
2.1 Essential Tools for Installation
Key tools for vertical metal siding installation include utility knives, screwdrivers, and saws for cutting panels. A drill with screwdriver and drill bits is necessary for securing panels. Snips or metal shears are handy for trimming. Safety gear like gloves and goggles is crucial. A measuring tape ensures accurate cuts, while a level guarantees straight alignment. Pencil and marker help mark surfaces. Additionally, a pry bar aids in removing old siding, and a ladder provides safe access to higher areas. Proper tools ensure efficiency and safety during installation, so gathering them beforehand is essential for a smooth process.
2.2 Required Materials and Accessories

Essential materials for vertical metal siding include high-quality panels, furring strips for surface preparation, and weatherproof fasteners. Trim and flashing are crucial for sealing edges and corners. J-channels and utility channels provide structural support. Insulation materials like foam boards enhance energy efficiency, while vapor barriers protect against moisture. Accessories such as shims, wood lath, and Z-flashing ensure proper alignment and weather tightness. Additionally, sealants and caulk are used to fill gaps, preventing air leaks and water intrusion. These materials work together to ensure a durable, weather-resistant, and visually appealing siding installation, meeting both functional and aesthetic requirements effectively.
Preparing the Wall Surface
Ensure the wall is level, clean, and free of debris. Install furring strips if needed to create a smooth surface. Address any gaps or uneven areas properly.
3.1 Installing Furring Strips
Furring strips are essential for creating a smooth, even surface for vertical metal siding. Typically made of wood (1×2 or 1×3), they are installed 16 to 24 inches on center. Ensure strips run perpendicular to the siding direction to prevent waves or distortion. Secure them firmly to the wall, checking for levelness. If the wall is uneven, use shims to align the strips properly. This step ensures the siding will lie flat and look professional. Properly installed furring strips also help with drainage and ventilation behind the siding, enhancing durability and weather resistance.
3.2 Handling Windows, Doors, and Obstacles
When installing vertical metal siding, windows, doors, and obstacles require special attention. Trim boards should be used to build out these areas, creating a flush surface for the siding. Ensure shingles extend at least 1 inch beyond the siding for proper weatherproofing. Flashing should be installed around windows and doors to prevent water infiltration. Maintain a minimum gap of 2 inches between the siding and any obstacles. Use J-Channels or utility channels to securely fasten the siding around these areas, hiding the backside of the trim for a seamless appearance. Proper handling ensures a professional finish and protects against weather damage.
Installing Vertical Metal Siding Panels
Begin with the foundation, ensuring panels are level and securely fastened. Align panels properly, using furring strips if necessary, to avoid waviness. Secure panels with approved fasteners.
4.1 Starting with the Foundation
Begin by ensuring the foundation is level and secure. Install furring strips if necessary to create a stable surface for the siding; Align the first panel with the wall’s base, ensuring it is plumb and level. Secure the panel using approved fasteners, leaving space for expansion. Double-check measurements and alignment before proceeding. Properly anchoring the foundation ensures a straight and even installation, preventing future issues like waviness or distortion. Always follow manufacturer guidelines for fastening and spacing to maintain structural integrity and weather tightness. Safety and accuracy are critical at this stage to set the project up for success.
4.2 Securing Panels and Trim
After aligning the panels, secure them to the wall using compatible fasteners, ensuring they fit snugly into the J-channels or trim. Properly fasten panels at the top and bottom to maintain stability. Use trim boards to cover gaps and create a seamless look. Double-check that panels are level and plumb before finalizing. Leave a small gap at joints for thermal expansion. Tighten fasteners firmly but avoid overtightening, which can damage the metal. Ensure all trim pieces are securely attached to provide a polished finish. Regularly inspect the alignment and tightness of panels during installation to prevent misalignment. Properly securing panels and trim guarantees a professional and durable exterior finish.
Flashings and Weatherproofing
Proper flashing around windows, doors, and roof edges ensures weather tightness. Use Z-flashing and drip edges to prevent water intrusion, and extend shingles at least 1 inch.
5.1 Proper Flashing Techniques
Ensure all flashings are installed to direct water away from the building. Use Z-flashing around windows and doors, and drip edges along roof lines. Extend roof shingles at least 1 inch over the drip edge. Secure flashings tightly to prevent gaps. Apply breathable vapor barriers behind flashings for moisture protection. Ensure proper alignment and sealing of all flashing components to maintain weather tightness. Regularly inspect flashings for damage or wear.
5.2 Ensuring Weather Tightness
To ensure weather tightness, secure all panels tightly and seal gaps with silicone sealants. Properly align panels to prevent water infiltration. Install gutters and downspouts to direct water away from the siding. Regularly inspect for loose fasteners and tighten as needed. Ensure trim and flashing are securely sealed around windows, doors, and roof lines. Extend roof shingles at least 1 inch over drip edges to prevent water seepage. Use breathable vapor barriers behind siding to manage moisture. Address any gaps or misalignments promptly to maintain the integrity of the siding system and protect against weather-related damage.

Safety and Best Practices
Always wear safety gear like gloves, goggles, and ear protection. Work slowly to avoid injuries and ensure proper panel alignment. Double-check measurements before cutting panels for a safe and accurate installation process.
6.1 Safety Precautions
When installing vertical metal siding, prioritize safety to avoid injuries. Always wear protective gear, including gloves, safety goggles, and ear protection, especially when cutting panels. Metal edges can be sharp, so handle them with care. Work slowly and ensure proper alignment to prevent accidents. Double-check measurements before cutting to minimize errors. Keep the workspace clean and clear of debris to avoid tripping hazards. Use non-slip footwear and ensure proper ventilation when working indoors. Never use damaged tools, as they can cause unpredictable results. Follow all power tool guidelines and consider having someone assist with heavy panels or equipment. Safety is paramount for a successful installation.
6.2 Avoiding Common Mistakes
To ensure a flawless installation, avoid common pitfalls. One frequent mistake is improper measurement, leading to ill-fitting panels. Always double-check dimensions and alignment before cutting. Another error is neglecting to level the wall surface, which can result in uneven siding. Use furring strips to even out the surface for a straight finish. Additionally, failing to secure panels properly can cause them to shift or detach over time. Ensure all fasteners are tightly screwed but avoid overtightening, which may damage the metal. Lastly, not accounting for expansion and contraction can lead to warping, so leave appropriate gaps between panels. Attention to detail is key for a professional-looking result.