
Dental Assistant Tray Setup: A Comprehensive Guide

Navigating dental procedures demands meticulous preparation; this guide details efficient tray setups, ensuring smooth workflows and optimal patient care consistently.
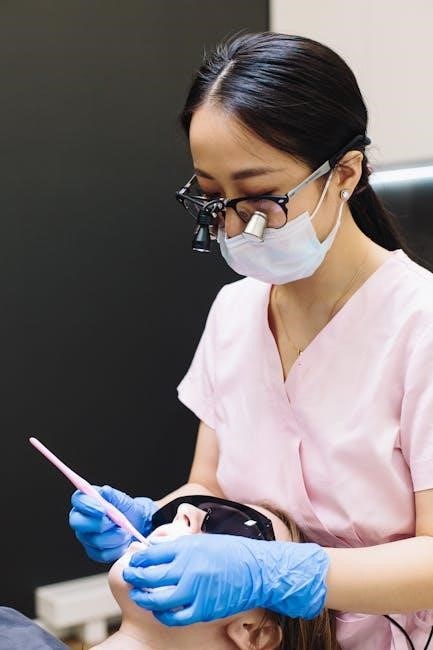
Dental tray setup is a foundational skill for any dental assistant, directly impacting the efficiency and success of dental procedures. A well-organized tray minimizes interruptions, allowing the dentist to focus entirely on patient care. This isn’t simply about arranging instruments; it’s a proactive approach to anticipating the dentist’s needs throughout the appointment.
Proper setup demonstrates a commitment to both the dentist and the patient, fostering a professional and comfortable environment. Understanding the sequence of instruments used in common procedures is crucial. This introduction will lay the groundwork for mastering this essential technique, covering the principles of organization, infection control, and adaptation to individual dentist preferences. Ultimately, proficient tray setup contributes significantly to a streamlined and positive dental experience for everyone involved.
II. Understanding the Core Principles
Effective dental tray setup isn’t merely about knowing what instruments to include, but why they’re arranged a certain way. Three core principles underpin successful setup: infection control, ergonomics, and operator preference. Maintaining strict asepsis is paramount, dictating sterilization protocols and barrier protection for all instruments and surfaces.
Ergonomic arrangement minimizes unnecessary reaching and movement, boosting efficiency and reducing strain for both dentist and assistant. Finally, recognizing that each dentist has unique habits and preferred workflows is vital. Adapting to these individual needs demonstrates professionalism and anticipates requirements. Mastering these principles creates a foundation for consistently delivering a safe, efficient, and personalized dental experience.

A. Infection Control & Sterilization
Maintaining a sterile field is non-negotiable in dentistry. All instruments must undergo appropriate sterilization procedures, adhering to CDC guidelines and OSHA regulations. Autoclaving remains the gold standard, ensuring complete elimination of microorganisms. Instruments are carefully inspected post-sterilization for package integrity and cleanliness.
Barrier protection, utilizing disposable sleeves and wraps, safeguards sterilized instruments from contamination during handling and setup. High-touch surfaces on the tray itself should be disinfected between patients. Proper handling of sharps, including disposal in designated containers, prevents needlestick injuries. Consistent adherence to these protocols minimizes cross-contamination risks, protecting both patients and dental personnel.
B. Ergonomics & Efficiency
Optimizing tray setup for ergonomics minimizes strain and maximizes efficiency. Frequently used instruments should be positioned within easy reach, reducing unnecessary movements. Consider the operator’s dominant hand and preferred working style when arranging the tray. A logical flow, grouping instruments by function, streamlines procedures.
Weight distribution on the tray is crucial; heavier instruments should be placed closer to the body for stability. Utilizing instrument cassettes can further enhance organization and portability. Proper lighting and chair positioning also contribute to a comfortable and efficient working environment. Thoughtful setup reduces fatigue and improves the overall quality of care provided to patients.
C. Operator Preference & Specializations
Acknowledging that each dentist has unique preferences is paramount. Some may favor a specific instrument brand, arrangement, or quantity. Adapting the tray setup to these individual needs fosters a collaborative and efficient working relationship. Furthermore, dental specializations – such as periodontics or oral surgery – necessitate distinct tray configurations.
A periodontist’s tray will prioritize scaling and root planing instruments, while an oral surgeon’s will focus on surgical tools. Maintaining separate, specialized trays prevents cross-contamination and ensures the correct instruments are readily available. Open communication with the dentist regarding their evolving needs is essential for maintaining an optimal and personalized tray setup.
III. Basic Tray Setup – General Dentistry
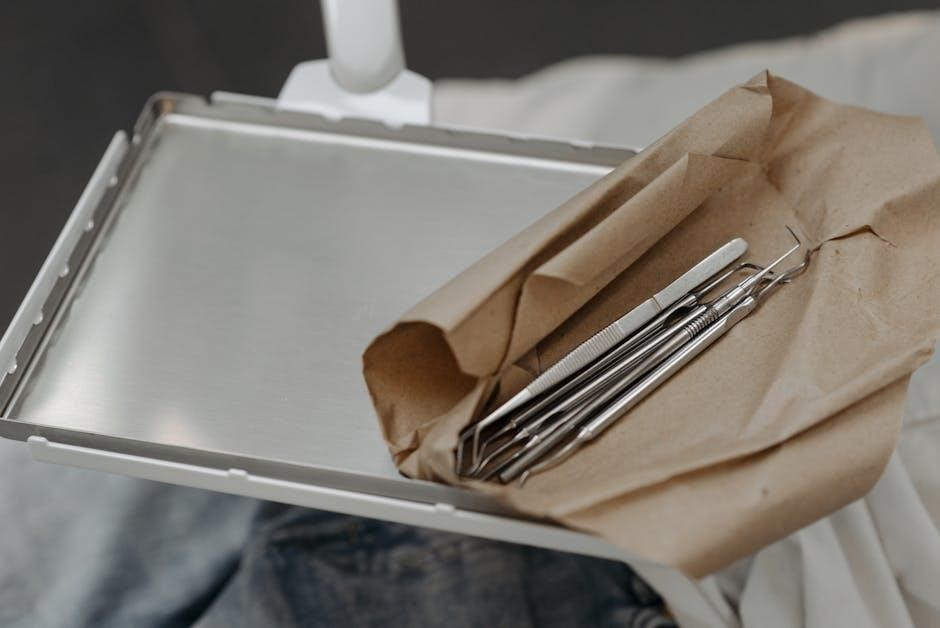
A foundational tray setup for general dentistry provides the tools for routine examinations, cleanings, and simple restorative procedures. This setup prioritizes accessibility and efficiency, allowing for a smooth transition between tasks. Instruments are generally categorized – exploration, examination, and restorative – and arranged logically based on their typical sequence of use.
Consider the dominant hand of the dentist when arranging instruments; frequently used items should be within easy reach. Maintaining a consistent layout minimizes searching and maximizes productivity. This basic setup serves as a versatile starting point, adaptable to individual operator preferences and specific patient needs, ensuring comprehensive care.
A. Essential Instruments – Exploration & Examination
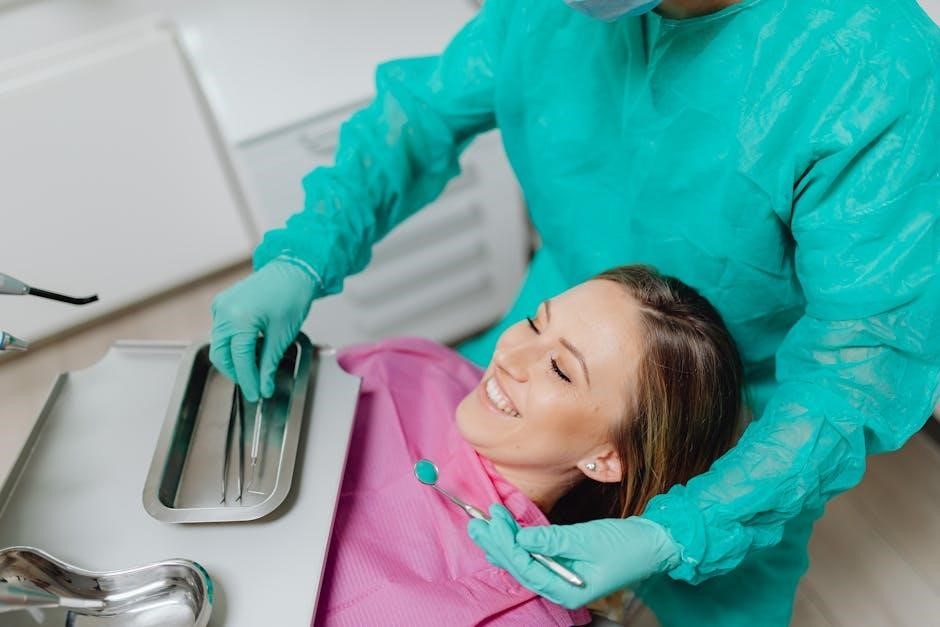
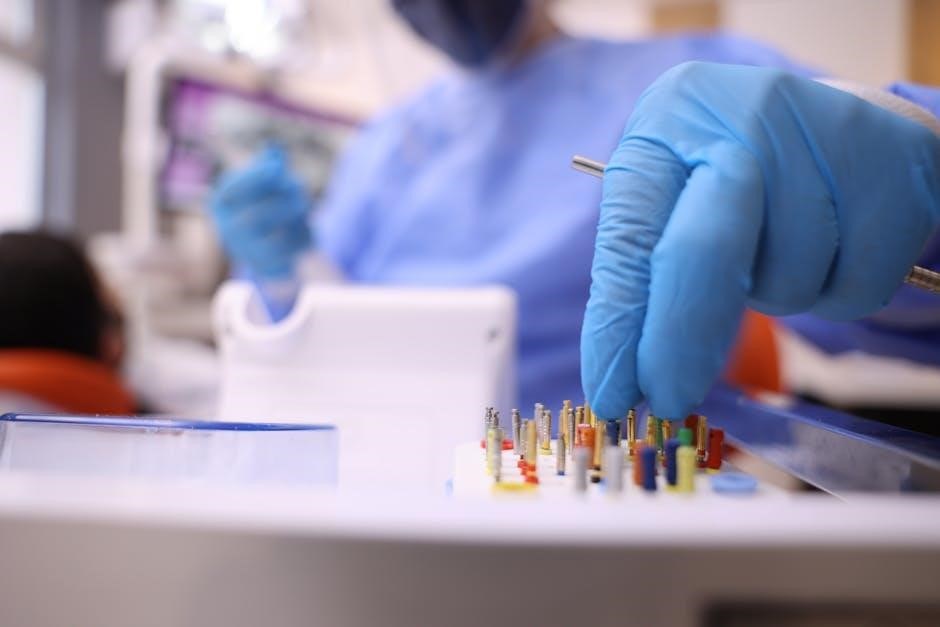
For thorough patient assessments, several instruments are crucial. The mouth mirror, typically positioned on the upper left for right-handed dentists, aids in visualization of indirect areas. Alongside it, an explorer – often a Marzavan or Whooley – is essential for detecting caries and assessing tooth surfaces. These are placed for immediate access.
Periodontal probes are vital for measuring pocket depths and assessing gingival health, usually positioned near the explorer. Additionally, include a disposable light-cured examination shield for improved visibility and patient comfort. Proper instrument arrangement ensures a seamless transition during the diagnostic phase, facilitating accurate and efficient examinations.
Mouth Mirror
The mouth mirror is a fundamental tool, typically rhodium-plated for optimal reflectivity and durability. It’s strategically placed on the tray, usually upper left for right-handed operators, allowing for quick and intuitive access. Ensure the mirror is free of scratches and debris before each use, maintaining clear visualization.
Different sizes are available; a standard size #5 is commonly used, though smaller sizes may be preferred for pediatric patients or accessing tight spaces. The assistant should anticipate the dentist’s needs, offering the mirror at the correct angle and ensuring a firm grip. Proper handling prevents damage and maximizes its effectiveness during exploration and examination procedures.
Explorer
Dental explorers are crucial for caries detection and assessing tooth morphology. They’re typically positioned adjacent to the mouth mirror, often on the upper right for right-handed dentists, facilitating a seamless workflow. A variety of explorer types exist – Spoon, Shepherd’s Hook, and Contra-angle explorers – each suited for specific clinical scenarios.
The assistant must ensure the explorer is sharp and clean, presenting it to the dentist with a secure grip. Proper technique involves using light pressure to avoid damaging tooth structure. Different explorer designs allow access to various surfaces, aiding in accurate diagnosis and treatment planning. Maintaining a sterile explorer is paramount for infection control.
B. Essential Instruments – Restorative
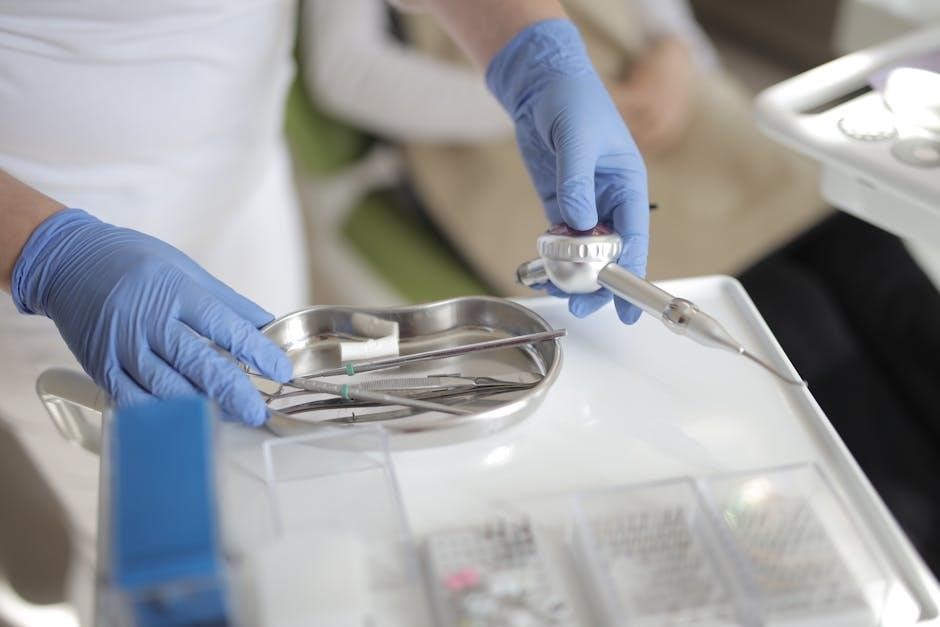
Restorative dentistry requires a precise arrangement of instruments. The high-speed handpiece, vital for cavity preparation, should be readily accessible with a selection of burs organized in a bur block, categorized by shape and grit. A low-speed handpiece, alongside a variety of mandrels, is essential for polishing and finishing procedures.
The assistant’s role includes ensuring the handpieces are functioning correctly and the bur block is well-stocked. Proper instrument transfer minimizes interruptions during the procedure. Additionally, a condenser, carving instruments, and articulating paper are frequently included for optimal restoration placement and refinement, contributing to long-lasting results.
High-Speed Handpiece & Bur Block
The high-speed handpiece is a cornerstone of restorative procedures, utilized for tooth preparation, crown removal, and cavity creation. It must be clean, lubricated, and tested for proper function before each appointment. The bur block, a crucial companion, organizes burs by type – round, pear-shaped, diamond, and carbide – and grit, facilitating quick selection.
Effective tray setup involves arranging burs logically, with frequently used shapes readily accessible. The assistant should anticipate the dentist’s needs, proactively offering the correct bur. Proper bur handling and disposal are paramount for safety and infection control. Regularly check for dull or damaged burs, replacing them promptly to maintain efficiency and precision.
Low-Speed Handpiece & Mandrels

Essential for polishing, caries removal, and applying finishing materials, the low-speed handpiece offers controlled precision. Alongside it, a selection of mandrels – latch-type and friction-grip – are vital for attaching various accessories like rubber points, brushes, and abrasive discs; The assistant’s role includes ensuring the handpiece operates smoothly and selecting the appropriate mandrel for each task.
Organization is key; mandrels should be neatly arranged, categorized by type, and readily available. Anticipate the dentist’s needs, offering the correct mandrel before it’s requested. Regularly inspect mandrels for wear and tear, replacing them as needed to prevent breakage and ensure optimal performance. Proper lubrication of the handpiece is also crucial for longevity.
C. Basic Materials – Composite & Amalgam
Restorative procedures necessitate readily accessible composite and amalgam materials. For composite, have shade tabs organized by manufacturer and a dispensing gun with appropriate tips available. Ensure composite warming devices are functioning correctly to optimize material flow and adaptation. Amalgam setup requires a capsule triturator, properly mixed capsules, and a carrier to efficiently transfer the material.
The assistant must understand the dentist’s preferred composite system and amalgam mixing protocol; Proper storage of both materials is critical – composite away from light and amalgam capsules in a cool, dry place. Be prepared to offer instruments for carving and condensing these materials promptly, streamlining the restorative process.
IV. Advanced Tray Setup – Specific Procedures
Beyond general dentistry, specialized procedures demand tailored tray setups. Anticipating the dentist’s needs for complex cases is paramount. This section focuses on endodontic and surgical setups, requiring distinct instrumentations and materials. Successful advanced procedures rely on meticulous preparation and a thorough understanding of the workflow.
The assistant must be proficient in recognizing the instruments and materials specific to each procedure. This includes knowing the purpose of each item and its proper handling. Efficiently arranging these items minimizes delays and promotes a sterile field, ultimately enhancing patient safety and treatment outcomes. Adaptability and proactive thinking are key.
A. Endodontic Tray Setup
Endodontic treatment requires a highly specialized tray setup focused on root canal procedures. Essential components include a variety of files and reamers, carefully organized by size and taper, typically displayed on a rubber dam clamp. Irrigation is critical; therefore, multiple syringes and needles of varying gauges are necessary for effective canal cleansing.
Additionally, the tray should contain sodium hypochlorite, EDTA, and sterile water for irrigation. Access burs, apex locators, and obturation materials like gutta-percha and sealer are also vital. A properly arranged endodontic tray facilitates smooth navigation through each step of the root canal process, ensuring precision and minimizing potential complications. Careful attention to detail is crucial.
Files & Reamers
Selecting and arranging files and reamers is paramount in endodontic procedures. K-files, H-files, and NiTi rotary files must be present, organized sequentially by size and taper – typically from small to large. Pre-curved files are beneficial for navigating curved canals, while straight files aid in initial negotiation.
Proper organization, often utilizing a file organizer or rubber dam placement, prevents confusion and ensures quick access during treatment. The assistant must understand the color-coding system for each file type. Reamers are used for initial canal enlargement, followed by filing to shape. Maintaining a sterile field and verifying file integrity before use are non-negotiable for patient safety and successful outcomes.
Irrigation Syringes & Needles
Effective endodontic treatment relies heavily on thorough irrigation. The tray must include a variety of syringes – typically a standard irrigation syringe and a side-port needle syringe – for delivering irrigants like sodium hypochlorite, EDTA, and chlorhexidine. A selection of needles, differing in gauge and length, is crucial for reaching apical regions without causing extrusion.
Needles should be pre-bent for optimal access in curved canals. The assistant’s role includes preparing the irrigants and anticipating the dentist’s needs during irrigation cycles. Maintaining a clear view of the working length and preventing irrigant aspiration are vital safety considerations. Proper disposal of used needles in a sharps container is mandatory, adhering to infection control protocols.
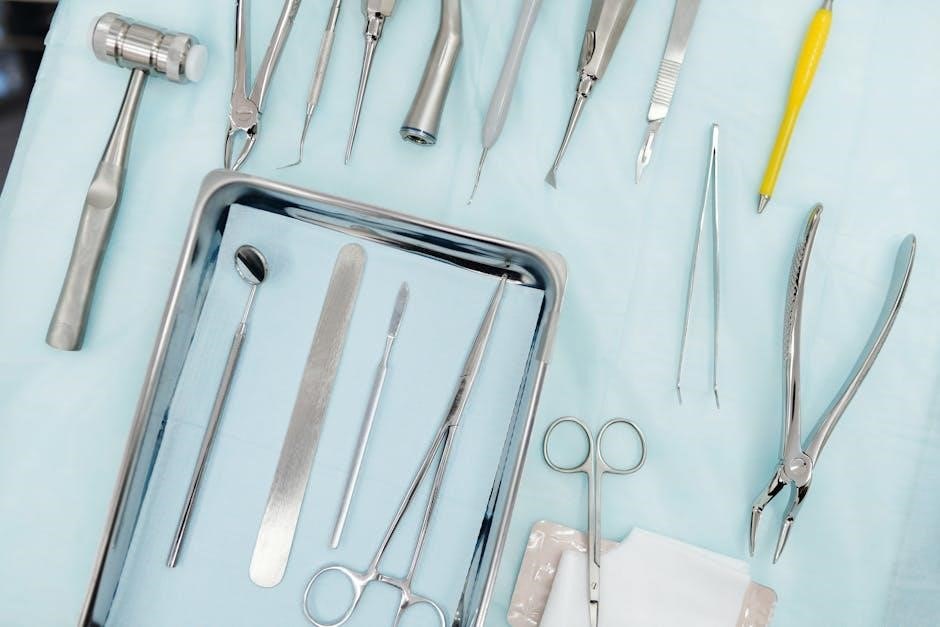
B. Surgical Tray Setup
Oral surgery trays demand a heightened level of sterility and precision. Essential components include a scalpel with a variety of blade options (11, 12, 15), carefully organized and readily accessible. Forceps – such as extraction forceps, bone forceps, and tissue forceps – are critical for grasping and manipulating tissues. Retractors, including periosteal elevators and mouth props, provide optimal visibility.
Suture materials, needle holders, and scissors are also fundamental. Bone files, if anticipated, should be included. The assistant must anticipate the surgeon’s needs, ensuring instruments are passed efficiently and safely. A sterile drape and suction apparatus are vital for maintaining a clean operative field. Emergency medications and equipment should be immediately available.
Scalpel & Blades
The scalpel is a cornerstone of surgical procedures, demanding careful handling and precise blade selection. Scalpel handles are typically reusable, while blades are disposable and come in various shapes – #10, #11, #12, #15 being common. #15 blades are frequently used for initial incisions, while #11 are ideal for precise tissue dissection.
Blades must be securely attached to the handle, and a blade remover is essential for safe disposal into a sharps container. The assistant should confirm the surgeon’s blade preference before the procedure. Maintaining a consistent supply of sterile blades is crucial. Proper technique prevents accidental cuts and ensures optimal surgical outcomes. Always prioritize safety when handling these sharp instruments.
Forceps & Retractors
Surgical forceps are indispensable for grasping and manipulating tissues during procedures. Several types exist, including Adson, Russian, and Debakey forceps, each designed for specific tasks. Retractors, similarly, provide visibility by gently holding back tissues – examples include periosteal elevators, mouth props, and Freer retractors.
The assistant must anticipate the surgeon’s needs, having a variety of forceps and retractors readily available. Sterile technique is paramount; instruments should be passed directly to the surgeon’s hand. Understanding the different instrument grips and their intended use optimizes surgical efficiency and minimizes tissue trauma. Careful handling prevents damage to delicate tissues and ensures a clear operative field.
V. Digital Dentistry Integration
Modern dental practices increasingly incorporate digital technologies, necessitating adjustments to traditional tray setups. Intraoral cameras capture high-resolution images for enhanced diagnostics and patient education, requiring a dedicated camera head and disposable barriers. Digital radiography eliminates the need for traditional film and processing, utilizing sensors connected to computer systems.
The assistant’s role expands to include managing digital workflows, ensuring proper sensor placement, and assisting with image acquisition. Maintaining software updates and troubleshooting basic connectivity issues are also crucial; Adapting the tray to accommodate these digital tools streamlines procedures and improves overall practice efficiency, while prioritizing patient safety and data security.
A. Intraoral Camera & Accessories
The intraoral camera is a vital diagnostic tool, demanding a dedicated space on the tray. Include the camera itself, various disposable sheaths for infection control, and a light source if not integrated. Ensure easy access to the camera’s control buttons for adjustments during use.
Consider adding a small spray bottle with anti-fog solution to maintain clear image quality. A suction tip should be readily available to remove excess saliva and debris. Proper positioning of the camera on the tray minimizes clutter and allows for swift deployment during examinations. Familiarity with different camera angles and settings is essential for optimal image capture.
B. Digital Radiography Sensors
Digital radiography sensors require careful handling and a designated, protective area on the tray. Include sensors of varying sizes (e.g., size 0, 1, 2) to accommodate different patient needs and radiographic techniques. A barrier envelope system is crucial for infection control; ensure an ample supply is readily available.
Position the sensors to prevent damage from instruments or accidental drops. Include a sensor cleaning wipe to maintain optimal image quality and prolong sensor life. A lead apron and thyroid collar should be easily accessible nearby, though not directly on the tray, for patient safety. Proper sensor storage is vital when not in use.
VI. Maintaining & Updating Your Tray Setup
Consistent tray maintenance is paramount for efficiency and infection control. Implement a routine schedule for checking instrument sharpness, replacing worn or damaged items, and verifying the functionality of all equipment. Regularly audit the tray against a standardized checklist to ensure completeness.
Stay informed about advancements in dental technology and materials. Update your tray setup to incorporate new instruments and techniques as they become standard practice. Continuing education for dental assistants is key to adapting to these changes. Document all updates and modifications to maintain consistency and facilitate training for new team members.
A. Regular Inventory Checks
Implementing frequent inventory checks is crucial for a consistently prepared dental tray. Establish a standardized checklist detailing each instrument and material, noting quantity and condition. These checks should occur daily, before sterilization, and after restocking. Discrepancies must be immediately addressed to prevent workflow disruptions.
Document findings meticulously, tracking instrument usage and replacement needs. This data informs purchasing decisions and helps identify frequently used items. Categorize instruments by priority – essential, frequently used, and rarely used – to optimize tray organization and minimize unnecessary clutter. A well-maintained inventory ensures preparedness for any procedure.
B. Adapting to New Technologies
The dental field rapidly evolves with technological advancements; tray setups must reflect these changes. Regularly assess new instruments and materials, integrating them thoughtfully into existing protocols. This requires ongoing training for the dental assistant to ensure proficient handling and understanding of new equipment.
Consider digital dentistry tools like intraoral cameras and digital radiography sensors, adjusting tray layouts to accommodate their unique requirements. Prioritize ergonomic placement for these additions, maintaining efficiency and minimizing strain. Embrace continuing education to stay informed about emerging technologies and their impact on tray setup best practices, ensuring a modern and effective workflow.